实验目的
掌握微服务项目的整合使用
掌握Swagger-UI的简单使用
练习内容
1、微服务项目整合
1.1、项目预览
1.1.1、在 https://github.com/shi469391tou/microservice-mallmanagement.git 地址下载,并导入Myeclipse中;

1.1.2、查看项目的结构

1.2、微服务项目的功能介绍
1.2.1、microservice-eureka-server(Eureka注册中心),搭建服务注册中心,子项目将通过配置注册到注册中心。修改配置application文件如下所示:
spring:application:name: eureka-server # 指定应用名称
server:port: 8761
eureka:client:register-with-eureka: falsefetch-registry: falseservice-url:defaultZone: http://localhost:${server.port}/eureka/
#      上线测试需要使用以下配置
#      defaultZone: http://eureka-server:${server.port}/eureka/
1.2.2、microservice-gateway-zuul,作为其他微服务项目的API网关,实现其他微服务接口的动态代理。配置application文件如下所示:
spring:application:name: gateway-zuul # 指定应用名称cloud:inetutils:preferred-networks:- 10.0   # 设置注册到Eureka中心的优选服务地址server:port: 8050eureka:instance:prefer-ip-address: true  #优选通过IP地址找到对应的服务名称client:#配置eureka注册中心地址serviceUrl:defaultZone: http://localhost:8761/eureka/
#      上线测试需要使用以下配置
#      defaultZone: http://eureka-server:8761/eureka/#设置Hystrix熔断器判定超时时间
#hystrix:
#  command:
#    default:
#      execution:
#        isolation:
#          thread:
#            timeoutInMilliseconds: 60000
zuul:ignoredServices: '*'routes:user-service:path: /user-service/**serviceId: user-serviceorder-service:path: /order-service/**serviceId: order-service

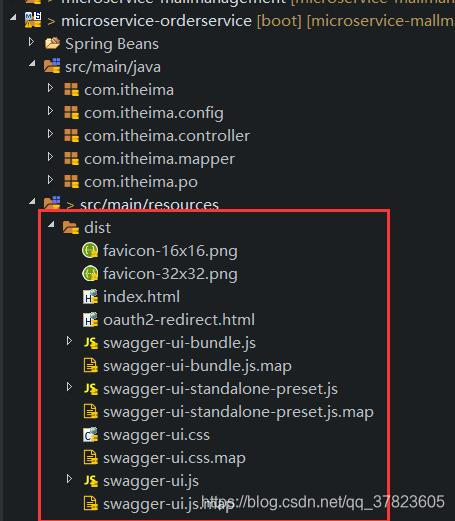
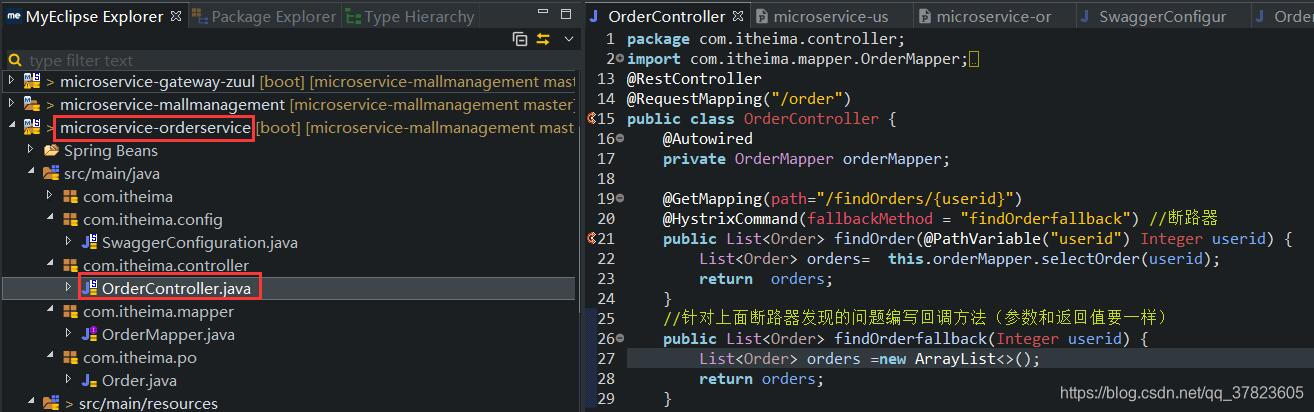
1.2.3、microservice-orderservice,主要用于商品订单管理,并提供有关订单管理的RESTFUL风格和API接口,配置application文件如下所示:
#DB Configuration
spring:datasource:driver-class-name: com.mysql.jdbc.Driverurl: jdbc:mysql://192.168.159.137:3306/microservice_mallmanagement
#    与Docker整合时可使用以下配置(也可以使用具体的ip+端口)
#    url: jdbc:mysql://mysql:3306/microservice_mallmanagementusername: rootpassword: a1s2d3f!application:name: order-service # 指定应用名称cloud:inetutils:preferred-networks:- 10.0   # 设置注册到Eureka中心的优选服务地址server:port: 7900 # 指定该Eureka实例的端口号
eureka:instance:prefer-ip-address: true  #优选通过IP地址找到对应的服务名称client:service-url:defaultZone: http://localhost:8761/eureka/  #配置eureka注册中心地址
#      上线测试需要使用以下配置
#      defaultZone: http://eureka-server:8761/eureka/
1.2.4、在microservice-orderservice中写对应的控制器类:
package com.itheima.controller;
import com.itheima.mapper.OrderMapper;
import com.itheima.po.Order;
import com.netflix.hystrix.contrib.javanica.annotation.HystrixCommand;
import org.springframework.beans.factory.annotation.Autowired;
import org.springframework.web.bind.annotation.GetMapping;
import org.springframework.web.bind.annotation.PathVariable;
import org.springframework.web.bind.annotation.RequestMapping;
import org.springframework.web.bind.annotation.RestController;import java.util.ArrayList;
import java.util.List;
@RestController
@RequestMapping("/order")
public class OrderController {@Autowiredprivate OrderMapper orderMapper;@GetMapping(path="/findOrders/{userid}")@HystrixCommand(fallbackMethod = "findOrderfallback") //断路器public List<Order> findOrder(@PathVariable("userid") Integer userid) {List<Order> orders=  this.orderMapper.selectOrder(userid);return  orders;}//针对上面断路器发现的问题编写回调方法(参数和返回值要一样)public List<Order> findOrderfallback(Integer userid) {List<Order> orders =new ArrayList<>();return orders;}
}
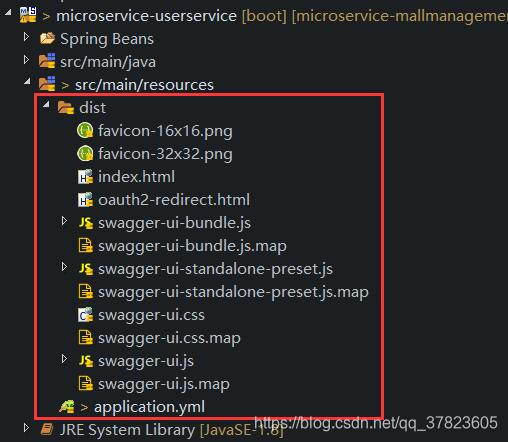
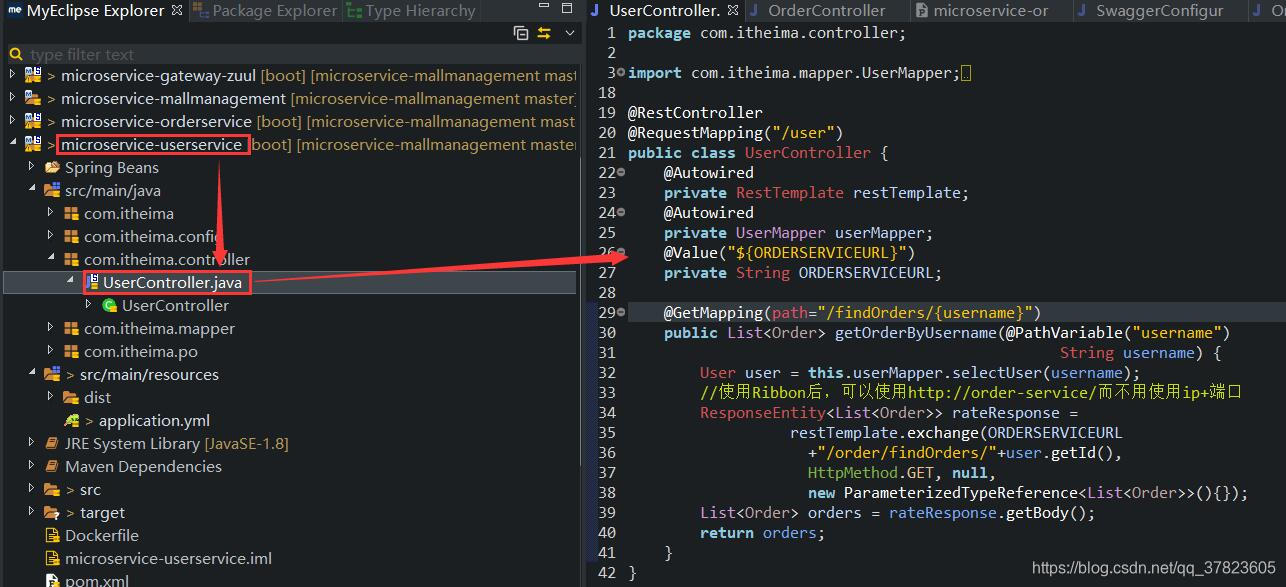
1.2.5、 microservice-userservice,主要用于商品用户管理,并提供有关用户管理的RESTFUL风格和API接口,配置application文件如下所示:
#DB Configuration
spring:datasource:driver-class-name: com.mysql.jdbc.Driverurl: jdbc:mysql://192.168.159.137:3306/microservice_mallmanagement
#    与Docker整合时可使用以下配置(也可以使用具体的ip+端口)
#    url: jdbc:mysql://mysql:3306/microservice_mallmanagementusername: rootpassword: a1s2d3f!application:name: user-service # 指定应用名称cloud:inetutils:preferred-networks:- 10.0   # 设置注册到Eureka中心的优选服务地址
server:port: 8030 # 指定该Eureka实例的端口号
eureka:instance:prefer-ip-address: true  #优选通过IP地址找到对应的服务名称client:service-url:defaultZone: http://localhost:8761/eureka/  #配置eureka注册中心地址
#      上线测试需要使用以下配置
#      defaultZone: http://eureka-server:8761/eureka/
#客户端动态访问常量配置
ORDERSERVICEURL: http://order-service/
1.2.6、在microservice-userservice中写对应的控制器类:
package com.itheima.controller;import com.itheima.mapper.UserMapper;
import com.itheima.po.Order;
import com.itheima.po.User;
import org.springframework.beans.factory.annotation.Autowired;
import org.springframework.beans.factory.annotation.Value;
import org.springframework.core.ParameterizedTypeReference;
import org.springframework.http.HttpMethod;
import org.springframework.http.ResponseEntity;
import org.springframework.web.bind.annotation.GetMapping;
import org.springframework.web.bind.annotation.PathVariable;
import org.springframework.web.bind.annotation.RequestMapping;
import org.springframework.web.bind.annotation.RestController;
import org.springframework.web.client.RestTemplate;import java.util.List;@RestController
@RequestMapping("/user")
public class UserController {@Autowiredprivate RestTemplate restTemplate;@Autowiredprivate UserMapper userMapper;@Value("${ORDERSERVICEURL}")private String ORDERSERVICEURL;@GetMapping(path="/findOrders/{username}")public List<Order> getOrderByUsername(@PathVariable("username")String username) {User user = this.userMapper.selectUser(username);//使用Ribbon后,可以使用http://order-service/而不用使用ip+端口ResponseEntity<List<Order>> rateResponse =restTemplate.exchange(ORDERSERVICEURL+"/order/findOrders/"+user.getId(),HttpMethod.GET, null, new ParameterizedTypeReference<List<Order>>(){});List<Order> orders = rateResponse.getBody();return orders;}
}
1.3 微服务项目启动与测试
CREATE DATABASE microservice_mallmanagement;
USE microservice_mallmanagement;DROP TABLE IF EXISTS `tb_order`;
CREATE TABLE `tb_order` (`id` int(11) NOT NULL AUTO_INCREMENT,`createtime` datetime DEFAULT NULL,`number` varchar(255) DEFAULT NULL,`userid` int(11) DEFAULT NULL,PRIMARY KEY (`id`)
) ENGINE=InnoDB AUTO_INCREMENT=3 DEFAULT CHARSET=UTF8;
INSERT INTO `tb_order` VALUES ('1', '2017-10-09 10:15:44', '201709181459001', '1');
INSERT INTO `tb_order` VALUES ('2', '2017-10-24 18:22:12', '201709181459008', '1');DROP TABLE IF EXISTS `tb_user`;
CREATE TABLE `tb_user` (`id` int(11) NOT NULL AUTO_INCREMENT,`address` varchar(255) DEFAULT NULL,`username` varchar(255) DEFAULT NULL,PRIMARY KEY (`id`)
) ENGINE=InnoDB AUTO_INCREMENT=2 DEFAULT CHARSET=UTF8;
INSERT INTO `tb_user` VALUES ('1', 'beijing', 'shitou');
1.3.2、查看表中的订单信息

1.3.3、查看用户表中信息

1.3.4、启动项目并运行成功后,通过地址http://localhost:8761,访问注册中心

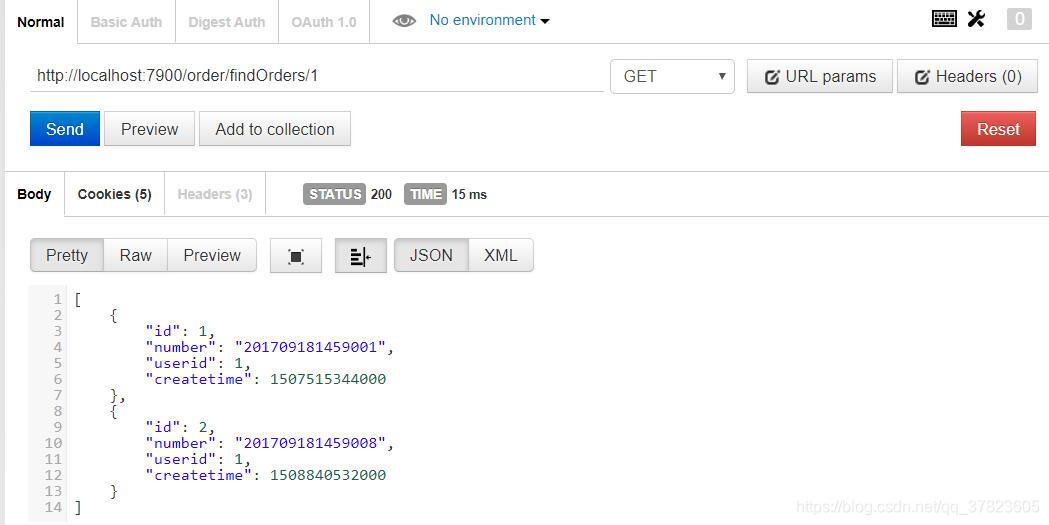
1.3.5、测试接口方法 http://localhost:7900/order/findOrders/1

1.3.6、测试API网关服务
http://localhost:8050/order-service/order/findOrders/1

2、接口可视化工具(Swagger-UI)的使用
2.1、Swagger-UI使用方法
2.1.1、下载Swagger-UI项目 https://github.com/swagger-api/swagger-ui.git

2.1.2、引入Swagger-UI
a)用户管理类
b)订单管理类
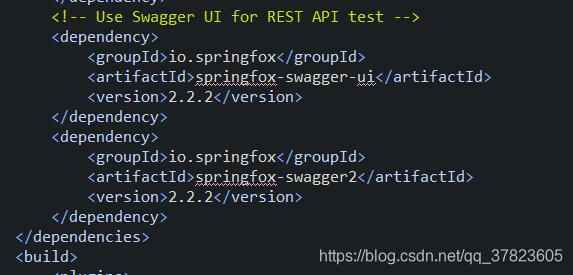
2.1.3、加入Swagger依赖
<!-- Use Swagger UI for REST API test --><dependency><groupId>io.springfox</groupId><artifactId>springfox-swagger-ui</artifactId><version>2.2.2</version></dependency><dependency><groupId>io.springfox</groupId><artifactId>springfox-swagger2</artifactId><version>2.2.2</version></dependency>a)用户管理类
b)订单管理类

2.1.4、编写配置类
a)订单管理类

b)用户管理类

2.2、Swagger-UI使用测试
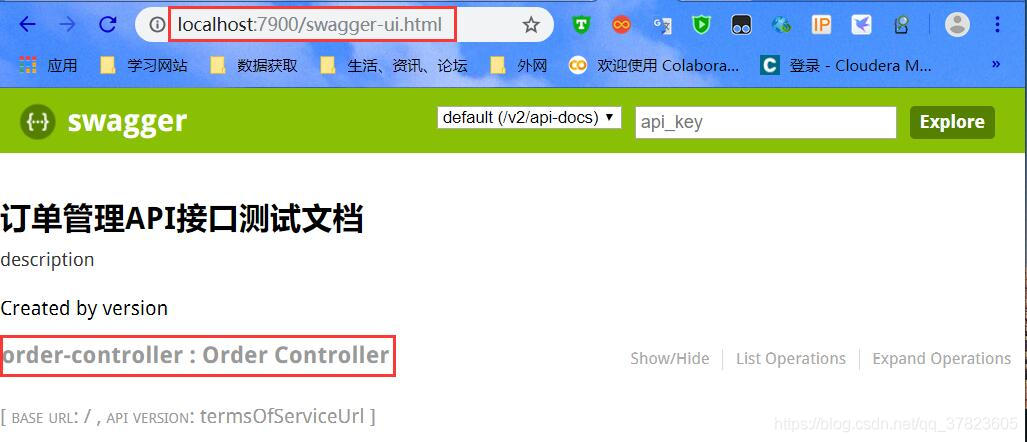
2.2.1、整合测试
重新启动项目,通过对应服务地址IP+端口+swagger-ui.html,列出接口控制类:

2.2.2、接口测试
单击user-controller面板,展示接口所有方法,单击某个方法,列出详细信息
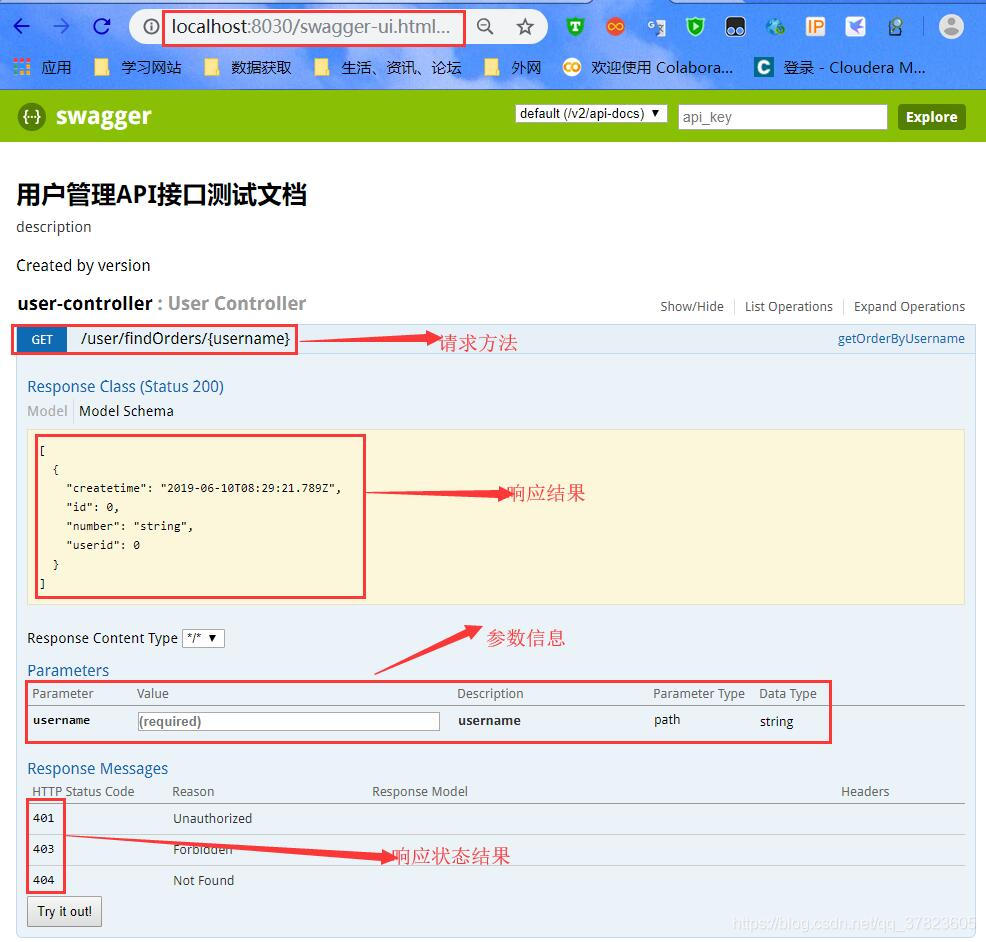
在参数信息栏,输入username的参数值shitou,单击Try it out按钮进行测试
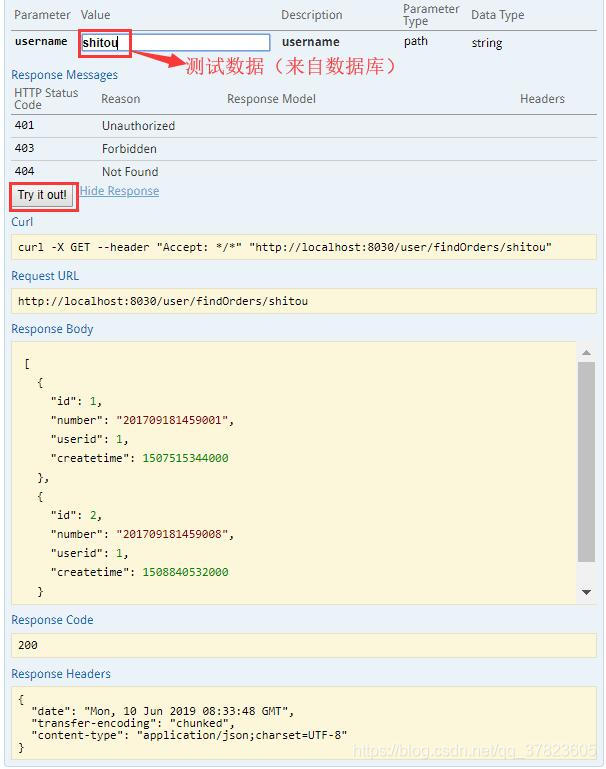
从图中可以看出,该方法查询出了username为shitou的用户订单信息,同时还提供了curl和URL两种请求方式,如果接口方法出现变更,只需要将对应的服务重启,并刷新文档页面就会自动更新对应的方法.
3、总结
学习掌握了Swagger-UI测试工具,该工具能在项目开发中高开发的效率以及简化操作


