实验架构图:

Table of Contents
1、配置tomcat
2、安装memcache
3、查看tomcat和memcache是否配置好
4、nginx实现负载均衡:
5、客户端进行测试:
6、验证结论:
7、总结:
实验环境:
linux redhat6.5 防火墙关闭,三台虚拟机和一台物理机
| 主机 | 操作系统 | IP地址 |
| nginx |
redhat6.5
| test1: 172.25.1.11 |
| tomcat1 | test2: 172.25.1.12 | |
| tomcat2 | test3: 172.25.1.13 | |
| memcache1 | test2: 172.25.1.12 | |
| memcache2 | test3: 172.25.1.13 |
解释: nginx做为反向代理,实现静动分离,将客户动态请求根据权重随机分配给两台tomcat服务器,memcache做为两台tomcat的共享session数据服务器。
1、配置tomcat
在test2和test3分别配置tomcat服务(这里只演示test2的配置,配置有区别的地方已经用红色标出来)
"""""""""""""""""""""""""""""""""""""""""""""""""""""""""""""""""""""""""""""""
[root@test2 ~]# tar zxf jdk-7u79-linux-x64.tar.gz -C /usr/local
[root@test2 ~]# ln -s /usr/local/jdk1.7.0_79/ /usr/local/jdk
[root@test2 ~]# vim /etc/profile
export JAVA_HOME=/usr/local/jdk
export CLASSPATH=.:$JAVA_HOME/lib:$JAVA_HOME/jre/lib
export PATH=$PATH:$JAVA_HOME/bin

[root@test2 ~]# source /etc/profile //刷新环境变量
[root@test2 ~]# which java //查看java路径
/usr/local/jdk/bin/java
[root@test2 ~]# which javac
/usr/local/jdk/bin/java
此时java环境就搭建好了
[root@test2 ~]# vim test.java //写一个java程序试试看能否运行,内容如下:
public class test
{
public static void main(String[] args)
{
System.out.println("hello world");
}
}
[root@test2 ~]# javac test.java //进行编译
[root@test2 ~]# java test //运行java![]()
此时我们安装tomcat
[root@test2 ~]# tar zxf apache-tomcat-7.0.37.tar.gz -C /usr/local/
[root@test2 ~]# cd /usr/local/
[root@test2 local]# ln -s apache-tomcat-7.0.37/ tomcat //做个软链接
[root@test2 local]# cd tomcat/apache-tomcat-7.0.37/
[root@test2 apache-tomcat-7.0.37]# mv * ..
[root@test2 apache-tomcat-7.0.37]# cd
session 的序列化方案官方推荐的有 4 种:
1. java serialization
2. msm-kryo-serializer
3. msm-javolution-serializer
4. msm-xstream-serializer
其中性能最好的序列化方案是 Kryo,此实验我们采用 kryo 方式。
把如下jar软件包下载好放置到/usr/local/tomcat/lib 目录中,jar软件包包含如下内容:

[root@test2 jar]# cd
[root@test2 ~]# mv jar/ /usr/local/tomcat/lib
[root@test2 ~]# cd /usr/local/tomcat/lib/jar/
[root@test2 jar]# mv * ..
[root@test2 jar]# cd ..
[root@test2 lib]# ls

[root@test2 ~]# rm -rf jar
[root@test2 ~]# vim /usr/local/tomcat/conf/context.xml //配置memcache缓存
......
<Manager className="de.javakaffee.web.msm.MemcachedBackupSessionManager"
memcachedNodes="n1:172.25.1.12:11211,n2:172.25.1.13:11211" //memcache的两个节点,11211是memcache的端口号
failoverNodes="n1" //test3和test2的区别是在这里写n2
requestUriIgnorePattern=".*\.(ico|png|gif|jpg|css|js)$"
transcoderFactoryClass="de.javakaffee.web.msm.serializer.kryo.KryoTranscoderFactory"
/>
</Context>
[root@test2 local]# cd tomcat/
[root@test2 tomcat]# bin/startup.sh //开启tomcat服务; /usr/local/tomcat/bin/shutdown.sh 为关闭tomcat服务

![]() //查看tomcat的端口号
//查看tomcat的端口号
此时,浏览器分别输入test2和test3对应的ip及服务端口号8080进行查看:


均可以访问到,此时test2和test3两主机的tomcat服务就搭建完成啦。
温馨提示:如果访问时出现网页空白的情况,可以尝试用ps命令查看tomcat(java)的进程id号,然后kill -9 id 将进程杀掉,然后重启服务,再次查看应该就可以了,网页还是出不来你可以先将配置memcache的配置文件刚才添加的内容删掉,看是否可以访问,若可以,则说明是配置文件添加的内容的问题;若不能访问,则是下载过程中的问题。
"""""""""""""""""""""""""""""""""""""""""""""""""""""""""""""""""""""""""""""""""""""""
2、安装memcache
test2和test3上执行:
"""""""""""""""""""""""""""""""""""""""""""""""""""""""""""""""""""""""""""""""""""""""""'
[root@test2 ~]# yum install -y memcache
[root@test2 ~]# /etc/init.d/memcached start
"""""""""""""""""""""""""""""""""""""""""""""""""""""""""""""""""""""""""""""""""""""""""
3、查看tomcat和memcache是否配置好
[root@test2 ~]# cd /usr/local/tomcat/logs/
[root@test2 logs]# > catalina.out
[root@test2 logs]# cd -
/usr/local/tomcat
[root@test2 tomcat]# ./bin/startup.sh
Using CATALINA_BASE: /usr/local/tomcat
Using CATALINA_HOME: /usr/local/tomcat
Using CATALINA_TMPDIR: /usr/local/tomcat/temp
Using JRE_HOME: /usr/local/jdk
Using CLASSPATH: /usr/local/tomcat/bin/bootstrap.jar:/usr/local/tomcat/bin/tomcat-juli.jar
[root@test2 tomcat]# cd -
/usr/local/tomcat/logs
[root@test2 logs]# cat catalina.out //看到如下结果,说明已经配置成功
![]()

![]()
4、nginx实现负载均衡:
用nginx默认自带的proxy和upstream模块来实现后端web负载均衡,用nginx的sticky模块实现session共享
这里要用到sticky模块,所以提前下载nginx及nginx-sticky-module压缩包,进行源码编译,具体步骤看上一篇博客的后半片(扩展模块sticky部分),这里不再赘述。
上文博客连接:https://blog.csdn.net/weixin_41922887/article/details/89421210
只在test1上进行:
"""""""""""""""""""""""""""""""""""""""""""""""""""""""""""""""""""""""""""""""""""""""""""""""
[root@test1 ~]# useradd -s /sbin/nologin nginx //创建nginx程序用户,编译的时候用到
[root@test1 ~]# id nginx
![]()
nginx已经实现sticky模块的负载均衡
[root@test1 ~]# /opt/nginx/sbin/nginx -t //查看nginx的状态
修改配置文件
[root@test1 ~]# vim /opt/nginx/conf/nginx.conf
user nginx nginx; //刚才创建的nginx用户worker_processes 2;
events {
worker_connections 65535;
}http {
upstream server {
sticky; //sticky模块,目的是当同一个用户动态访问时将请求发到同一个tomcat上,实现session的共享
server 172.25.1.12:8080;
server 172.25.1.13:8080;
}
include mime.types;
default_type application/octet-stream;sendfile on;
keepalive_timeout 65;#gzip on;
server{
listen 80;
server_name www.westos.org; //访问时的域名
location / {
root html;
index index.html index.htm;
}
location ~ \.jsp$ { //所有 jsp 页面交给 tomcat 处理,动静分离
proxy_pass http://server;
}error_page 500 502 503 504 /50x.html;
location = /50x.html {
root html;
}
}
}
[root@test1 ~]# /opt/nginx/sbin/nginx -t //检查语法是否有错误
[root@test1 ~]# /opt/nginx/sbin/nginx //开启服务
此时,我们的所有服务就搭建完成了。
5、客户端进行测试:
测试nginx服务:

静态测试:
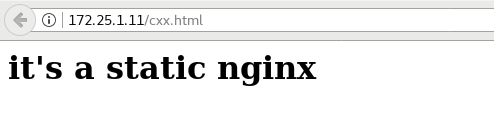
在test1上执行:
[root@test1 ~]# cd /opt/nginx/html/ //nginx的默认发布路径
[root@test1 html]# ls
50x.html index.html
[root@test1 html]# vim cxx.html //写一个静态的文件cxx.html
<h1>it's a static nginx</h1>
此时在网页进行测试:
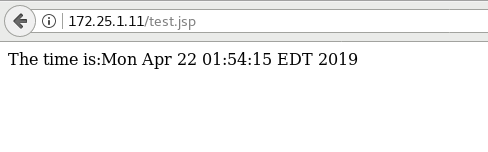
动态测试:
test2和test3都执行(这里只演示test2):
[root@test2 ~]# cd /usr/local/tomcat/webapps/ROOT/
[root@test2 ROOT]# vim test.jsp
The time is:<%=new java.util.Date() %>
客户端进行访问:
再如:
[root@test2 ROOT]# vim cxx.jsp
<%@ page contentType="text/html; charset=GBK" %>
<%@ page import="java.util.*" %>
<html><head><title>Cluster App Test</title></head>
<body>
Server Info:
<%
out.println(request.getLocalAddr() + " : " + request.getLocalPort()+"<br>");%>
<%
out.println("<br> ID " + session.getId()+"<br>");
String dataName = request.getParameter("dataName");
if (dataName != null && dataName.length() > 0) {
String dataValue = request.getParameter("dataValue");
session.setAttribute(dataName, dataValue);
}
out.print("<b>Session list</b>");
Enumeration e = session.getAttributeNames();
while (e.hasMoreElements()) {
String name = (String)e.nextElement();
String value = session.getAttribute(name).toString();
out.println( name + " = " + value+"<br>");
System.out.println( name + " = " + value);
}
%>
%<form action="test.jsp" method="POST">
%name:<input type=text size=20 name="dataName">
%<br>
%key:<input type=text size=20 name="dataValue">
%<br>
%<input type=submit>
%</form>
%</body>
%</html>
[root@test2 ROOT]# scp westos.jsp root@test3:/usr/local/tomcat/webapps/ROOT //test2和test3同时添加,scp直接发过去就好


可以看出,访问动态页面时用到后端服务器,这里接受访问请求的是test2,对应的memcache是test3
也可以看出,不管怎么刷新或者重新访问,只要是同一台主机,则接受请求的服务器不会变,和第一次访问时是同一台服务器。
6、验证结论:
现在将test3的memcache服务关闭并进行刷新操作,则此时:
[root@test3 tomcat]# /etc/init.d/memcached stop //可以看出此时memcache变为test2节点,而请求还是会交给test2的 tomcat,没有因为test3的memcache挂掉而丢掉

将test3的memcache恢复状态
[root@test3 tomcat]# /etc/init.d/memcached start
刷新时memcache不会变回去
此时将test2的tomcat服务宕掉,并刷新:
[root@test2 tomcat]# /usr/local/tomcat/bin/shutdown.sh

访问结果为:

此时,memcache仍然为test2
7、总结:
不同的主机访问时会调度到不同的 tomcat 实例上处理,来自同一主机的请求会交给同一个 tomcat 实例处理,此时你 down 掉当前正在响应的 tomcat 实例,nginx 会自动把用户的请求调度到另一个 tomcat 实例上,同时 session 也没有丢掉。
原理:当test2中tomcat宕机后,test3接管会话后从本地的memcache处读取memcache的信息。
当test2的memcache宕机后,test3的tomcat中会将会话信息存至本地,以致session不会丢失。


