😁博客主页😁:🚀https://blog.csdn.net/wkd_007🚀
🤑博客内容🤑:🍭嵌入式开发、Linux、C语言、C++、数据结构、音视频🍭
🤣本文内容🤣:🍭SS528开发板编译Linux内核ALSA驱动、移植alsa-lib、采集与播放usb耳机声音🍭
😎金句分享😎:🍭来忘掉错对,来怀念过去,曾共度患难日子总有乐趣 ——《友情岁月》🍭
目录
- 一、概述
- 二、编译ALSA驱动
- 2.1 配置和编译ALSA驱动模块
- 2.2 在ss528开发板插入ALSA驱动
- 三、交叉编译 alsa-lib
- 3.1 下载 alsa-lib
- 3.2 交叉编译 alsa-lib
- 四、开发ALSA应用层程序
- 4.1 编写应用层代码 alsa-capture-playback.c
- 4.2 运行程序 alsa-capture-playback
- 五、总结
![]()
一、概述
上篇文章【音视频|ALSA】ALSA是什么?ALSA框架详细介绍 简单地介绍了ALSA驱动;这篇文章主要是一篇实战文章,通过ALSA架构,在SS528开发板实现播放usb耳机声音。整个操作大概分为三步:
- 编译ALSA驱动
- 交叉编译
alsa-lib库- 基于
alsa-lib库开发采集、播放音频程序
本文使用开发环境:
- 开发主机:
Ubuntu18.04LTS- 交叉编译工具:
aarch64-mix210-linux-gcc- 使用的Linux内核源码:ss528sdk自带的,
SS528V100_SDK_V2.0.0.3/open_source/linux/linux-4.19.y- 使用的alsa-lib库:ALSA官网下载的
alsa-lib-1.2.10
![]()
二、编译ALSA驱动
在Linux系统中,要播放usb接口的音频,首先需要先有一个可以识别到这个usb耳机的驱动,然后再针对这个驱动编写应用层代码。自己写的话,耗时耗力不讨好,而ALSA架构就提供了这样的驱动和应用层的库,下面介绍怎样在Linux源码编译ALSA驱动,并将其编译成模块,插入到板子的Linux系统。
2.1 配置和编译ALSA驱动模块
首先进入Linux源码目录,配置启用ALSA驱动:
cd linux-4.19.y
make ARCH=arm64 CROSS_COMPILE=aarch64-mix210-linux- menuconfig
参考下面语句配置:
	Device Drivers  --->
		<M> Sound card support  --->
			<M>   Advanced Linux Sound Architecture  --->
				[*]   PCM timer interface (NEW)
				[*]   Support old ALSA API (NEW)
				[*]   Sound Proc FS Support (NEW)
				[*]     Verbose procfs contents (NEW)
				[*]   Generic sound devices (NEW)  --->
				[*]   PCI sound devices (NEW)  --->
				(2048) Pre-allocated buffer size for HD-audio driver
				[*]   SPI sound devices (NEW)  ----
				[*]   USB sound devices (NEW)  --->
					<M>   USB Audio/MIDI driver
配置完成后,保存退出,执行下面语句编译模块:
make ARCH=arm64 CROSS_COMPILE=aarch64-mix210-linux- modules
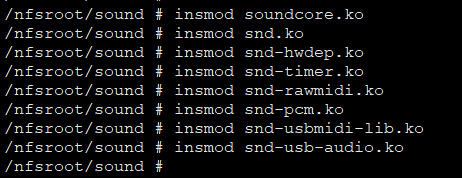
编译完成后,在sound目录下,有8个ko生成,将它们复制到开发板的文件系统即可:
$ find ./sound/ -name "*.ko"
./sound/core/snd.ko
./sound/core/snd-hwdep.ko
./sound/core/snd-rawmidi.ko
./sound/core/snd-timer.ko
./sound/core/snd-pcm.ko
./sound/usb/snd-usbmidi-lib.ko
./sound/usb/snd-usb-audio.ko
./sound/soundcore.ko
$ mkdir /nfsroot/sound
$ cd sound/
$ cp soundcore.ko core/*.ko usb/*.ko /nfsroot/sound -far
2.2 在ss528开发板插入ALSA驱动
说明:下面的打印都是在开发板文件系统的操作打印。
开发板在没用插入ALSA驱动之前,是没有
/dev/snd目录、/prc/asound目录的:/nfsroot/sound # ls /dev/snd ls: /dev/snd: No such file or directory /nfsroot/sound # ls /proc/asound ls: /prc/asound: No such file or directory /nfsroot/sound #
插入ALSA驱动,参考下面命令:
insmod soundcore.ko
insmod snd.ko
insmod snd-hwdep.ko
insmod snd-timer.ko
insmod snd-rawmidi.ko
insmod snd-pcm.ko
insmod snd-usbmidi-lib.ko
insmod snd-usb-audio.ko
注意insmod的顺序,避免报错:insmod: can’t insert ‘snd.ko’: unknown symbol in module, or unknown parameter
插入成功后,可以看到
/dev/snd目录、/prc/asound目录:

卸载ALSA驱动,参考下面语句:
rmmod snd-usb-audio rmmod snd-usbmidi-lib rmmod snd-pcm rmmod snd-rawmidi rmmod snd-timer rmmod snd-hwdep rmmod snd rmmod soundcore注意rmmod的顺序,避免报错:rmmod: can’t unload module ‘soundcore’: Resource temporarily unavailable
![]()
三、交叉编译 alsa-lib
3.1 下载 alsa-lib
在官网 https://www.alsa-project.org/files/pub/lib/ 可以下载到历史版本;
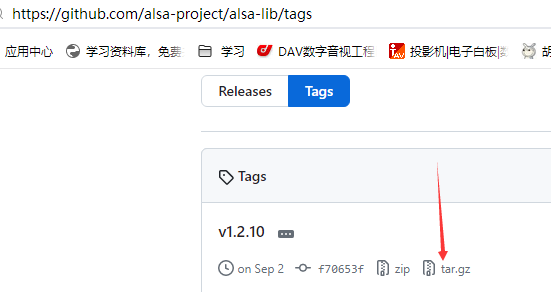
在Github https://github.com/alsa-project/alsa-lib/tags 可以下载到最新发布版本
本文下载的是 alsa-lib-1.2.10.tar.gz
3.2 交叉编译 alsa-lib
解压源码,如果里面没有configure文件,需要执行下面命令生成:
libtoolize --force --copy --automake
aclocal
autoheader
automake --foreign --copy --add-missing
autoconf
编译过程参考下面命令:
sudo mkdir /usr/lib/alsa-lib-1.2.10
sudo chown wkd:wkd /usr/lib/alsa-lib-1.2.10/ -R
tar zxf alsa-lib-1.2.10.tar.gz
cd alsa-lib-1.2.10/
./configure --prefix=/usr/lib/alsa-lib-1.2.10/ CC=aarch64-mix210-linux-gcc --host=aarch64-mix210-linux --enable-static=yes --enable-shared=no
make && make install
这里首先创建了/usr/lib/alsa-lib-1.2.10目录,因为链接了libasound.a后,程序需要到安装目录寻找配置文件share/alsa/alsa.conf,所以这里安装的目录需要和开发板存放的目录一致。
如果指定了--prefix为其他目录,就需要将share/alsa/alsa.conf复制到开发板同样的目录,否则运行程序会报错:Cannot access file /usr/lib/alsa-lib-1.2.10/share/alsa/alsa.conf,也可以通过选项--with-configdir来指定配置文件目录。
![]()
四、开发ALSA应用层程序
4.1 编写应用层代码 alsa-capture-playback.c
代码参考:https://blog.csdn.net/u014056414/article/details/120989131
// alsa-capture-playback.c
// aarch64-mix210-linux-gcc alsa-capture-playback.c -I /usr/lib/alsa-lib-1.2.10/include/ -L /usr/lib/alsa-lib-1.2.10/lib/ -l asound -lpthread -ldl -lm -o alsa-capture-playback

#include <stdio.h>
#include <fcntl.h>
#include <sys/types.h>
#include <sys/stat.h>
#include <sys/wait.h>
#include <alsa/asoundlib.h>


#define PLAYBACK_FILE "48000Hz-16bit-2ch-ChengDu.pcm"  // 采样率:48000 位深度:16bit 双通道
#define CAPTURE_FINE "capture.pcm"

//#define PCM_NAME	"hw:CARD=mycodec,DEV=0"
#define PCM_NAME	"hw:0,0"
#define RATE 		48000
#define FORMAT		SND_PCM_FORMAT_S16_LE
#define CHANNELS	1

snd_pcm_hw_params_t *hw_params;

int print_all_pcm_name(void) {
	char **hints;
	/* Enumerate sound devices */
	int err = snd_device_name_hint(-1, "pcm", (void***)&hints);
	if(err != 0)
	   return -1;

	char** n = hints;
	while(*n != NULL) {
		char *name = snd_device_name_get_hint(*n, "NAME");

		if(name != NULL && 0 != strcmp("null", name)) {
			printf("pcm name : %s\n",name);
			free(name);
		}
		n++;
	}

	snd_device_name_free_hint((void**)hints);
	return 0;
}

snd_pcm_t *open_sound_dev(snd_pcm_stream_t type,const char *name, unsigned int rate, int format,int channels,snd_pcm_uframes_t *period_frames) {
	int err;
	snd_pcm_t *handle;
	int dir = 0;

	printf("rate=%d, format=%d, channels=%d\n",rate,format,channels);

	if((err = snd_pcm_open(&handle, name, type, 0)) < 0) {
		printf("cannot snd_pcm_open (%s)\n",
			 snd_strerror(err));
		return NULL;
	}

	if((err = snd_pcm_hw_params_malloc(&hw_params)) < 0) {
		printf("cannot allocate hardware parameter structure (%s)\n",
			 snd_strerror(err));
		return NULL;
	}

	if((err = snd_pcm_hw_params_any(handle, hw_params)) < 0) {
		printf("cannot initialize hardware parameter structure (%s)\n",
			 snd_strerror(err));
		return NULL;
	}

	if((err = snd_pcm_hw_params_set_access(handle, hw_params, SND_PCM_ACCESS_RW_INTERLEAVED)) < 0) {
		printf("cannot set access type (%s)\n",
			 snd_strerror(err));
		return NULL;
	}

	if((err = snd_pcm_hw_params_set_format(handle, hw_params, format)) < 0) {
		printf("cannot set sample format (%s)\n",
			 snd_strerror(err));
		return NULL;
	}

	if((err = snd_pcm_hw_params_set_rate_near(handle, hw_params, &rate, 0)) < 0) {
		printf("cannot set sample rate (%s)\n",
			 snd_strerror(err));
		return NULL;
	}

	if((err = snd_pcm_hw_params_set_channels(handle, hw_params, channels)) < 0) {
		printf("cannot set channel count (%s) channels=%d\n",snd_strerror(err),channels);
		if(channels==2)
		{
			channels = 1;
		}
		if(channels==1)
		{
			channels = 2;
		}

		if((err = snd_pcm_hw_params_set_channels(handle, hw_params, channels)) < 0) {
			printf("cannot set channel count (%s)\n",snd_strerror(err));
			return NULL;
		}
	}

#if 1
	unsigned int buffer_time, period_time;
	if (snd_pcm_hw_params_get_buffer_time_max(hw_params, &buffer_time, 0) < 0) {
		fprintf(stderr, "Error snd_pcm_hw_params_get_buffer_time_max\n");
		return NULL;
	}
	if(snd_pcm_stream(handle) == SND_PCM_STREAM_PLAYBACK)
	{
		if (buffer_time > 50000)
			buffer_time = 50000;	//50ms 这个数越小数据取的越快
	}
	period_time = buffer_time / 4;
	if (snd_pcm_hw_params_set_buffer_time_near(handle, hw_params, &buffer_time, 0) < 0) {
		fprintf(stderr, "Error snd_pcm_hw_params_set_buffer_time_near\n");
		return NULL;
	}

	if (snd_pcm_hw_params_set_period_time_near(handle, hw_params, &period_time, 0) < 0) {
		fprintf(stderr, "Error snd_pcm_hw_params_set_period_time_near\n");
		return NULL;
	}

#endif

	if((err = snd_pcm_hw_params(handle, hw_params)) < 0) {
		printf("cannot set parameters (%s)\n",
			 snd_strerror(err));
		return NULL;
	}

	if(period_frames != NULL) {
		//获取一个周期有多少帧数据
		if((err =snd_pcm_hw_params_get_period_size(hw_params, period_frames, &dir)) < 0){
			printf("cannot get period size (%s)\n",
				snd_strerror(err));
			return NULL;
		}
	}

	snd_pcm_hw_params_free(hw_params);
	return handle;
}

int main(void) {
	int p,err;
	snd_pcm_t *playback_handle;
	snd_pcm_t *capture_handle;
	int pfd,cfd;
	snd_pcm_uframes_t period_frames;
	int size2frames;

	printf("program running ...\n");

	//查看所有pcm的name
	print_all_pcm_name();

	playback_handle = open_sound_dev(SND_PCM_STREAM_PLAYBACK,
                                     PCM_NAME,RATE,FORMAT,CHANNELS,&period_frames);
	if(!playback_handle) {
		printf("cannot open for playback\n");
        return -1;
    }

	usleep(5);

	capture_handle = open_sound_dev(SND_PCM_STREAM_CAPTURE,PCM_NAME,RATE,FORMAT,CHANNELS,NULL);
	if(!capture_handle) {
		printf("cannot open for capuure\n");
		snd_pcm_close(playback_handle);
        return -1;
    }

	if((err = snd_pcm_prepare(playback_handle)) < 0) {
		printf("cannot prepare audio interface for use (%s)\n",
			 snd_strerror(err));
		goto out;
	}

	if((err = snd_pcm_prepare(capture_handle)) < 0) {
		printf("cannot prepare audio interface for use (%s)\n",
			 snd_strerror(err));
		goto out;
	}

	//打开要播放的PCM文件
	pfd = open(PLAYBACK_FILE,O_RDONLY,0644);
	if(pfd < 0){
		printf("open %s error!!!\n",PLAYBACK_FILE);
		goto out;
	}

	//新建一个进程, 子进程播放, 父进程录音
	p = fork();
	if(p < 0) {
		printf("fork error!!!\n");
		goto out;
	}

	if(p==0) {
		char *pbuf;
		int size,period_bytes;
		period_bytes = snd_pcm_frames_to_bytes(playback_handle,period_frames);
		pbuf = malloc(period_bytes);
		int i = 0;
		for(; i<100; i++)
		{
			printf("[%s %d]times = %d\n",__FILE__,__LINE__,i);
			lseek(pfd, 0, SEEK_SET);
			while( size = read(pfd, pbuf, period_bytes)) {
				//解决最后一个周期数据问题
				if(size < period_bytes) {
					memset(pbuf+size, 0, period_bytes-size);
				}

				//size2frames = snd_pcm_bytes_to_frames(playback_handle,size);
				size2frames = period_frames;

				//向PCM写入数据,播放
				err = snd_pcm_writei(playback_handle, pbuf, size2frames);
				if(err == -EPIPE) {
					snd_pcm_prepare(playback_handle);
					fprintf(stderr, "<<< snd_pcm_writei --> Buffer Underrun >>> \n");
					err = snd_pcm_writei(playback_handle, pbuf, size2frames);
					if(err != size2frames) {
						printf("write to audio interface failede err:%d (size2frames:%d)\n",err,size2frames);
						free(pbuf);
						close(pfd);
						exit(-1);
					}
				}
				else if(err != size2frames) {
					printf("write to audio interface failede err:%d (size2frames:%d)\n",err,size2frames);
					free(pbuf);
					close(pfd);
					exit(-1);
				}
				//printf("process:playback wrote %d frames\n",size2frames);
				usleep(100);
			}
		}

		free(pbuf);
		close(pfd);
		sleep(1);	//等待一下,给点时间父进程录音
		exit(0);
	}

	char *cbuf;
	const int frames_size = snd_pcm_frames_to_bytes(capture_handle,period_frames);
	cbuf = malloc(frames_size);
	memset(cbuf, 0, frames_size);

	//打开录音的保存文件
	cfd = open(CAPTURE_FINE,O_RDWR | O_TRUNC | O_CREAT,0644);
	if(cfd < 0){
		printf("open %s error!!!\n",CAPTURE_FINE);
		goto out;
	}

	while(waitpid(p, NULL, WNOHANG) == 0) {	//查看一下子进程是否已经退出
		//向PCM读一周期数据
		if((size2frames = snd_pcm_readi(capture_handle, cbuf, period_frames)) < 0) {
			printf("read from audio interface failed (%d)\n",size2frames);
			free(cbuf);
			close(cfd);
			goto out;
		}
		//printf("--process:capture read %d frames\n",size2frames);
		write(cfd,cbuf,snd_pcm_frames_to_bytes(capture_handle,size2frames));
		memset(cbuf,0,frames_size);
		usleep(100);
	}
	free(cbuf);
	close(cfd);

out:
	snd_pcm_close(playback_handle);
	snd_pcm_close(capture_handle);
	printf("program finish ...\n");
	return 0;
}
复制上面代码保存为alsa-capture-playback.c,然后参考下面命令编译:
aarch64-mix210-linux-gcc alsa-capture-playback.c -I /usr/lib/alsa-lib-1.2.10/include/ -L /usr/lib/alsa-lib-1.2.10/lib/ -l asound -lpthread -ldl -lm -o alsa-capture-playback
4.2 运行程序 alsa-capture-playback
首先,在开发板插入驱动,参考上面 2.2 节;
其次,复制alsa-lib交叉编译生成的 /usr/lib/alsa-lib-1.2.3.2/share/alsa/alsa.conf 文件到开发板同样的路径;
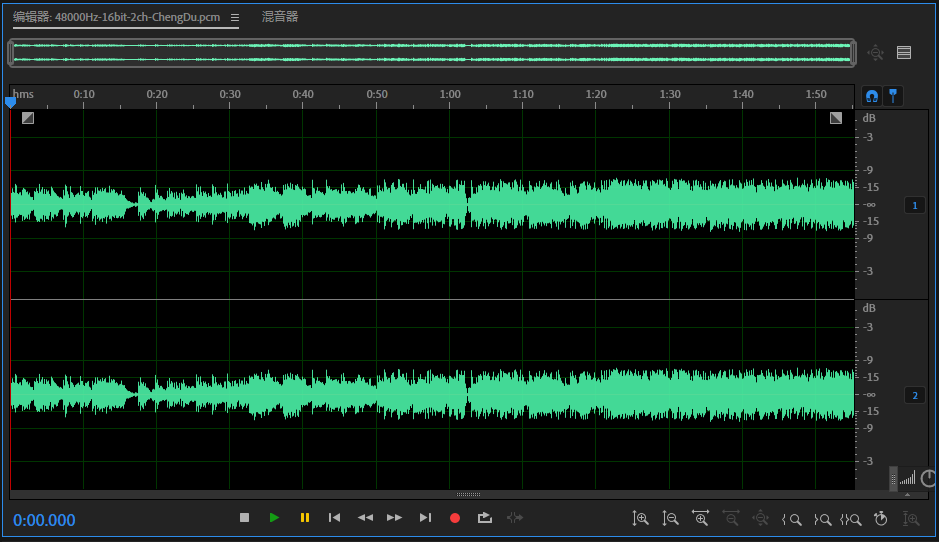
最后,复制应用程序 alsa-capture-playback 和任意 48KHZ的双通道16bit的pcm文件 48000Hz-16bit-2ch-ChengDu.pcm到开发板任一目录,执行alsa-capture-playback;
顺利执行的话,可以在耳机听到播放的pcm文件声音,并且执行的目录下会生成record.pcm。我使用的pcm文件是48KHZ的双通道16bit的,点击 下载链接 可以下载,音频打开如下图:
![]()
五、总结
本篇文章介绍了在Linux开发板使用ALSA架构播放usb耳机声音的实例,包括了:编译安装ALSA驱动、交叉编译alsa-lib、实现ALSA应用层程序。

如果文章有帮助的话,点赞👍、收藏⭐,支持一波,谢谢 😁😁😁