概述
自定义Chronometer实现定时器,引用方便,操作简单。
详细
前言
在Android开发过程中,计时控件是经常回使用到的,在Android控件库中有一个能快捷实现计时功能的控件,它就是Chronometer,今天我们基于它自定义实现一个方便调用的计时控件TimeChronometer。
今天涉及知识有:
Chronometer常用方法TimeChronometer在Activity中使用- 效果图和项目结构图
一. Chronometer 常用方法
Chronometer实质是一个TextView,其具备TextView特性,也有以下自己的特性:
    //设置是否倒计时
    setCountDown(boolean countDown)
    //获取是否倒计时
    isCountDown()
    //设置基准时间
    setBase(long base)
    //设置时间格式
    setFormat(String format)
    //设置定时器监听
    setOnChronometerTickListener(OnChronometerTickListener listener)
    //启动
    start()
    //停止
stop()需要注意的是Chronometer的setFormat(String format)方法并不能改变时间显示格式,Chronometer显示格式为00:00:00
二. TimeChronometer 在 Activity 中使用
这里我继承Chronometer实现了一个方便调用的定时器TimeChronometer,下面给出TimeChronometer在Activity中使用过程。
先在Activity中引用控件:
    <?xml version="1.0" encoding="utf-8"?>
    <androidx.constraintlayout.widget.ConstraintLayout xmlns:android="http://schemas.android.com/apk/res/android"
        xmlns:app="http://schemas.android.com/apk/res-auto"
        xmlns:tools="http://schemas.android.com/tools"
        android:layout_width="match_parent"
        android:layout_height="match_parent"
        tools:context=".ui.MainActivity">
        <TextView
            android:id="@+id/tv_name"
            android:layout_width="wrap_content"
            android:layout_height="wrap_content"
            android:text="Hello World!"
            app:layout_constraintBottom_toBottomOf="parent"
            app:layout_constraintLeft_toLeftOf="parent"
            app:layout_constraintRight_toRightOf="parent"
            app:layout_constraintTop_toTopOf="parent"
            app:layout_constraintVertical_bias="0.08" />
        <Button
            android:id="@+id/btn"
            android:layout_width="wrap_content"
            android:layout_height="wrap_content"
            android:layout_marginTop="30dp"
            android:text="计时"
            app:layout_constraintEnd_toEndOf="parent"
            app:layout_constraintStart_toStartOf="parent"
            app:layout_constraintTop_toBottomOf="@+id/tv_name" />
        <Button
            android:id="@+id/btn2"
            android:layout_width="wrap_content"
            android:layout_height="wrap_content"
            android:layout_marginTop="30dp"
            android:text="倒计时"
            app:layout_constraintEnd_toEndOf="parent"
            app:layout_constraintStart_toStartOf="parent"
            app:layout_constraintTop_toBottomOf="@+id/btn" />
        <Button
            android:id="@+id/btn3"
            android:layout_width="wrap_content"
            android:layout_height="wrap_content"
            android:layout_marginTop="30dp"
            android:text="重置"
            app:layout_constraintEnd_toEndOf="parent"
            app:layout_constraintStart_toStartOf="parent"
            app:layout_constraintTop_toBottomOf="@+id/btn2" />
        <com.ktdemo.function.TimeChronometer
            android:id="@+id/timeChronometer"
            android:layout_width="wrap_content"
            android:layout_height="wrap_content"
            android:layout_marginTop="10dp"
            app:layout_constraintEnd_toEndOf="parent"
            app:layout_constraintStart_toStartOf="parent"
            app:layout_constraintTop_toBottomOf="@+id/btn3" />
</androidx.constraintlayout.widget.ConstraintLayout>然后在Activity中调用:
    @RequiresApi(Build.VERSION_CODES.N)
    class MainActivity : AppCompatActivity(), View.OnClickListener {
        private lateinit var mBingding: ActivityMainBinding
        override fun onCreate(savedInstanceState: Bundle?) {
            super.onCreate(savedInstanceState)
            mBingding = ActivityMainBinding.inflate(layoutInflater)
            setContentView(mBingding.root)
            initData()
            setListener()
        }
        private var initData = {
            mBingding.tvName.text = "我是谁"
        }
        private var setListener = {
            LogUtil.i("====setListener=====")
            mBingding.btn.setOnClickListener(this)
            mBingding.btn2.setOnClickListener(this)
            mBingding.btn3.setOnClickListener(this)
        }
        override fun onClick(v: View) {
            when (v.id) {
                R.id.btn -> {
                    LogUtil.i("====我点击了=====")
                    mBingding.timeChronometer.countUp(10*1000,{
                        LogUtil.i("=======这是什么======")
                        Toast.makeText(this@MainActivity,"结束了?",Toast.LENGTH_SHORT).show()
                    })
                }
                R.id.btn2 -> {
                    LogUtil.i("====我点击了===2==")
                    mBingding.timeChronometer.countDown(10*1000,{
                        LogUtil.i("=======这是什么======")
                        Toast.makeText(this@MainActivity,"结束了?",Toast.LENGTH_SHORT).show()
                    })
                }
                R.id.btn3 -> {
                    LogUtil.i("====我点击了===3==")
                    mBingding.timeChronometer.reset()
                }
                else -> {
                }
            }
        }
    }
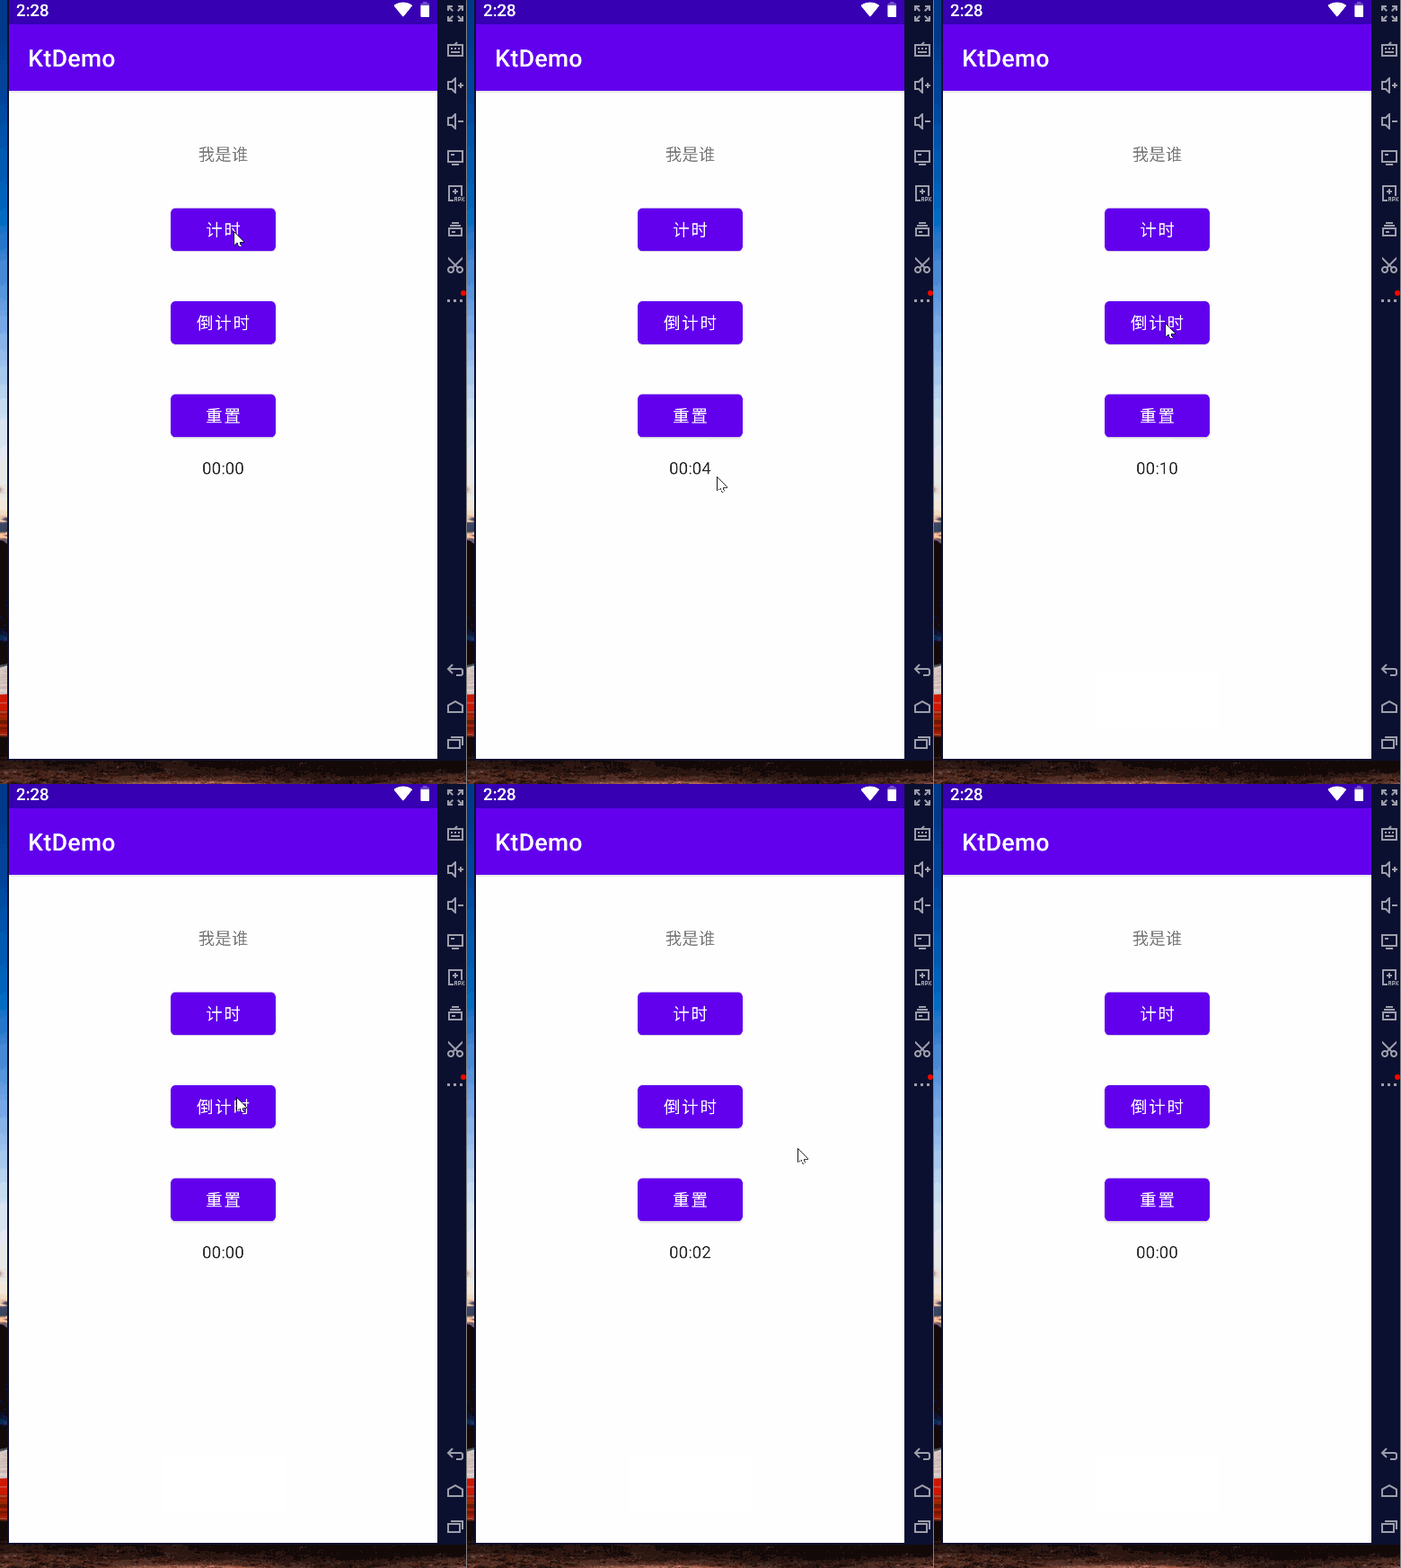
三. 效果图和项目结构图

ok,今天关于自定义Chronometer时间控件的代码就讲到这里了,谢谢大家。
